The Bread Monk
  • Home
  • My Bread Blog
  • Breadhead Videos
  • Recipes
  • Fr. Dom's Books
  • Events/Programs
  • Shortcut Stollen
  • New Page

Four Corner Danish Pastries

2/3/2022

0 Comments

 
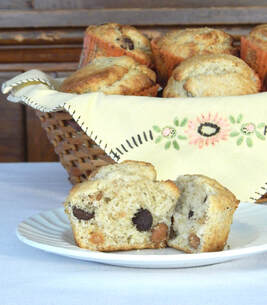
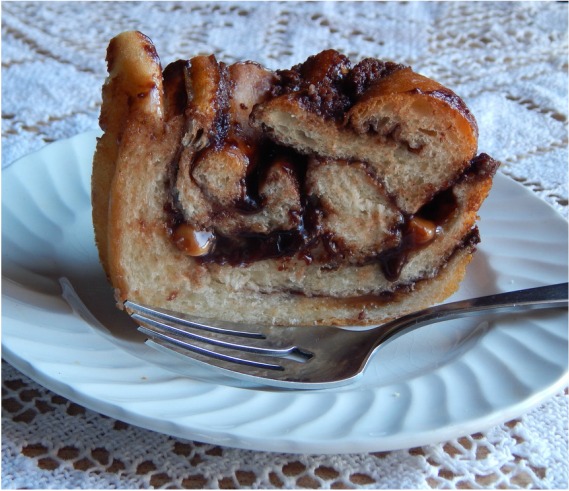
In my last post I gave the recipe for Danish Pastry dough. Here's a good beginner's recipe to make some modestly-sized treats for family and friends.  
Picture
Four Corner Danish Pastries
​1 batch of Danish Pastry Dough 
Preserves, pie filling, chutney, etc.
 
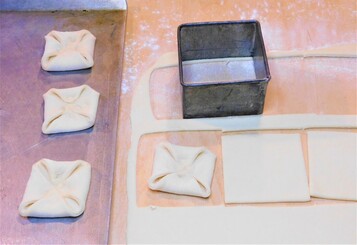
Prepare a 9” x 13” baking sheet with parchment or vegetable cooking spray. Divide dough in half. Leave half, wrapped, in the refrigerator. On a lightly floured surface, roll portion of dough into a 9” x 9” rectangle. When you roll out the dough it’s almost impossible to get the edges perfectly straight, so roll it out 10” x 10” and trim it as needed. 
 Using a pastry cutter or a sharp knife, divide dough into 9 squares. I often use a vintage 3” x 3” cookie cutter I found in a monastery junk drawer. 

Picture
Picture
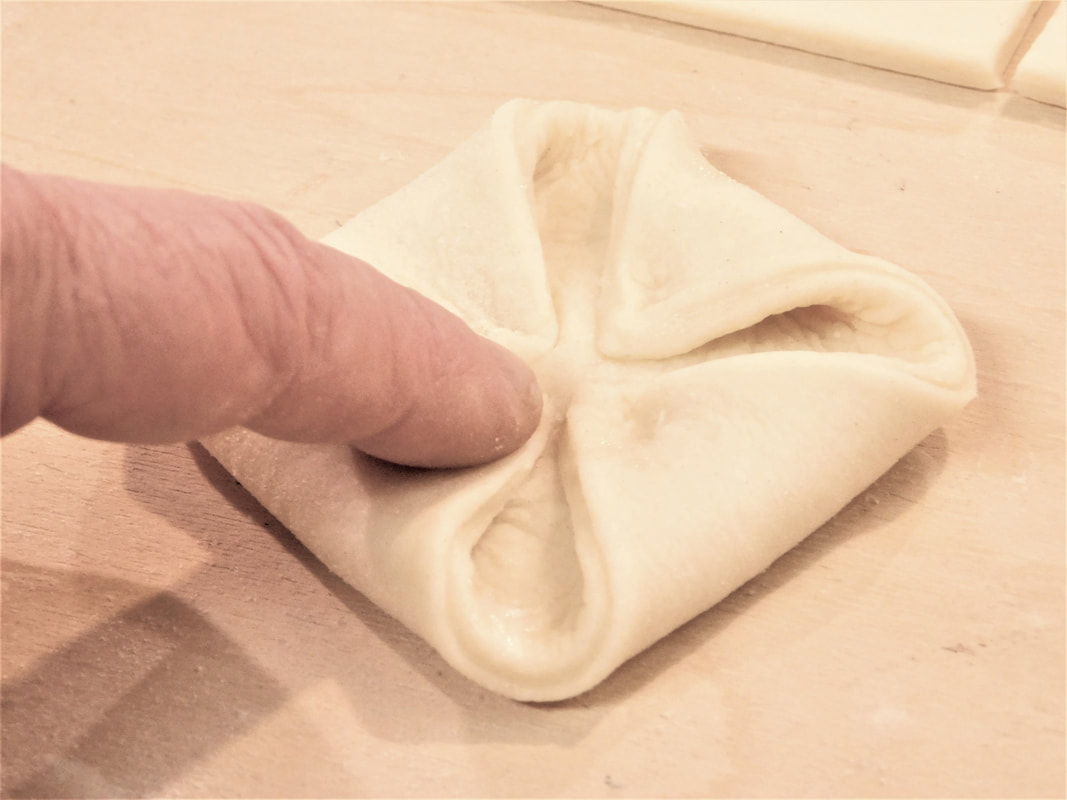
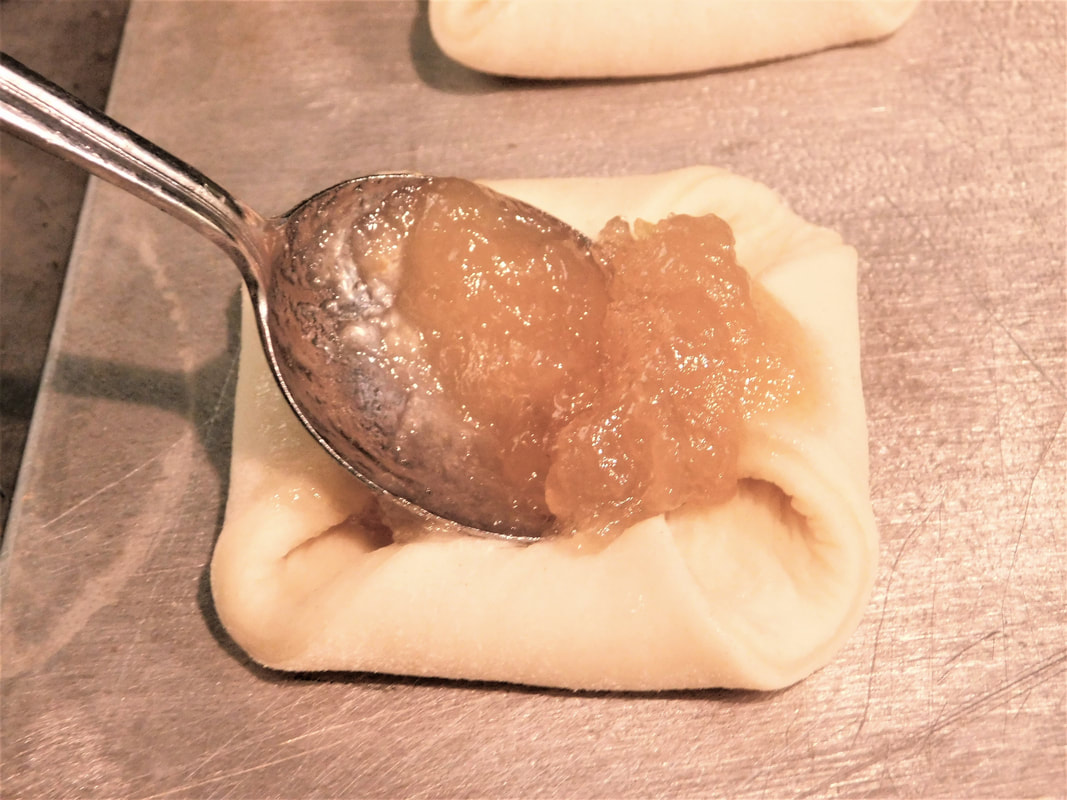
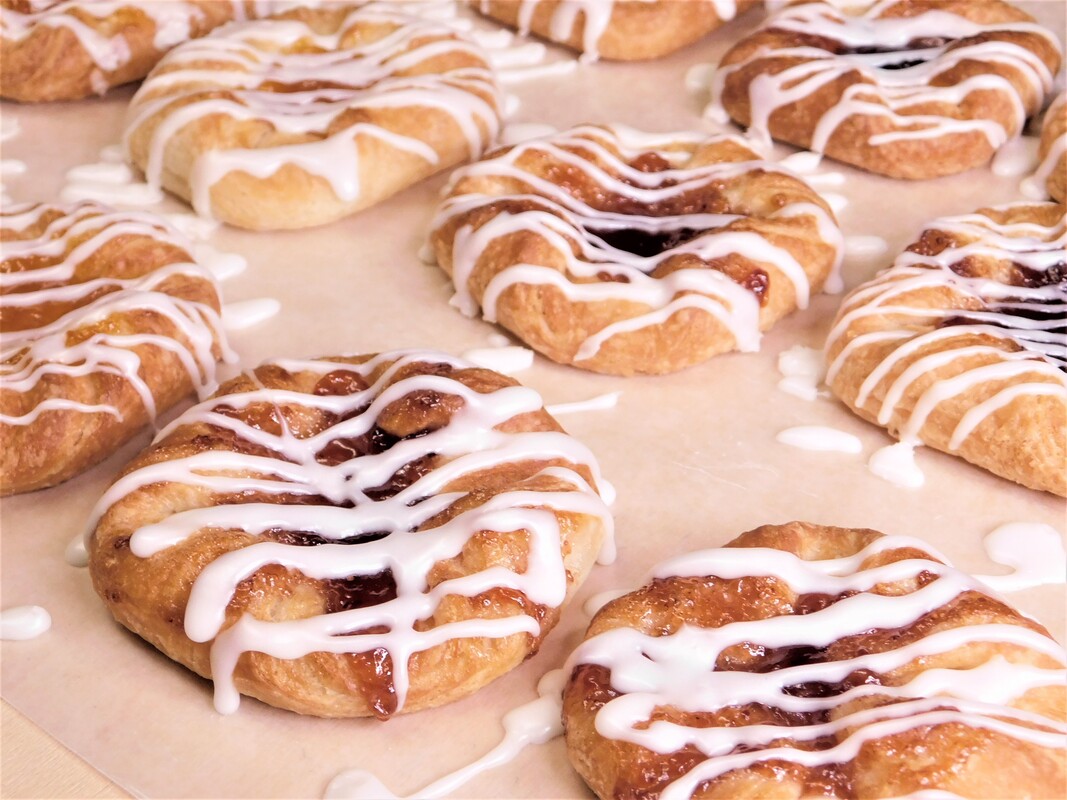
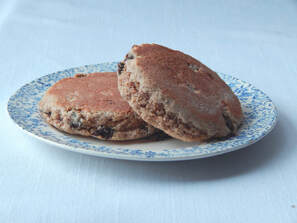
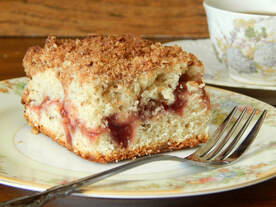
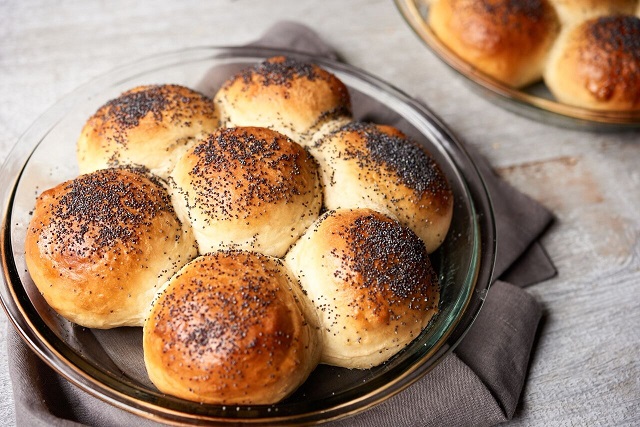
​On each square, bring the corners to the center and press down with your fingers to make an indentation about the size of a quarter. Add a tablespoon of filling to the center and place on the baking sheet. Repeat with second portion of dough or use to make some other pastry.
Picture
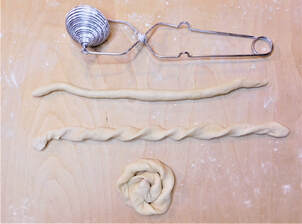
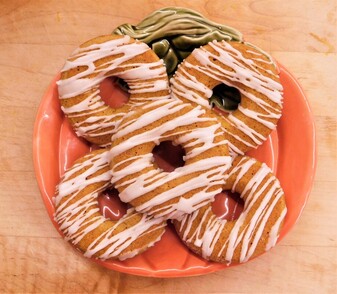
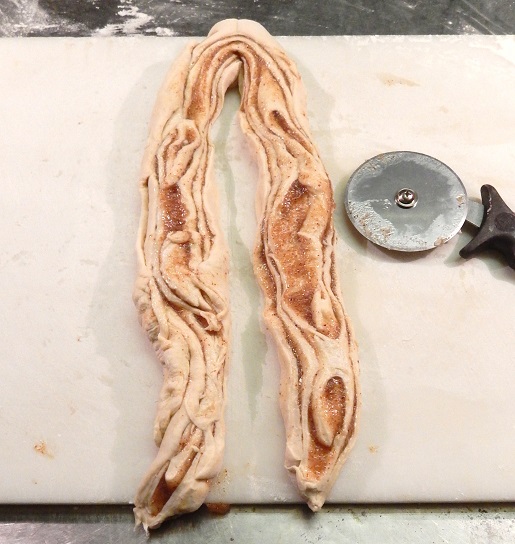
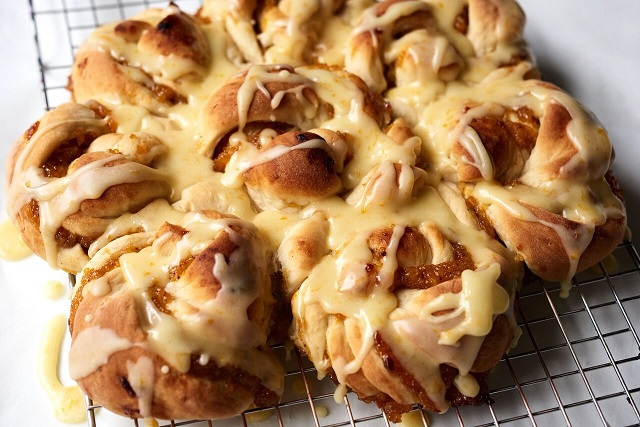
You can use the trimmings to make spiral pastries as shown here. Knead the dough scraps together, divide and roll into ropes, flatten each one slightly and shape as shown. Place on the baking sheet and add the filling. I like this better than trying to roll the leftovers out to cut more squares. Besides, they make nice samples for the kitchen help!

​Preheat oven to 350° F.  Cover the baking sheet with a clean dry towel and allow pastries to rise for 30 to 45 minutes or until nearly doubled. Place in the preheated oven and bake for 15 minutes or until golden brown. Remove from oven and allow to cool on the baking sheet. Drizzle with powdered sugar icing.
Picture
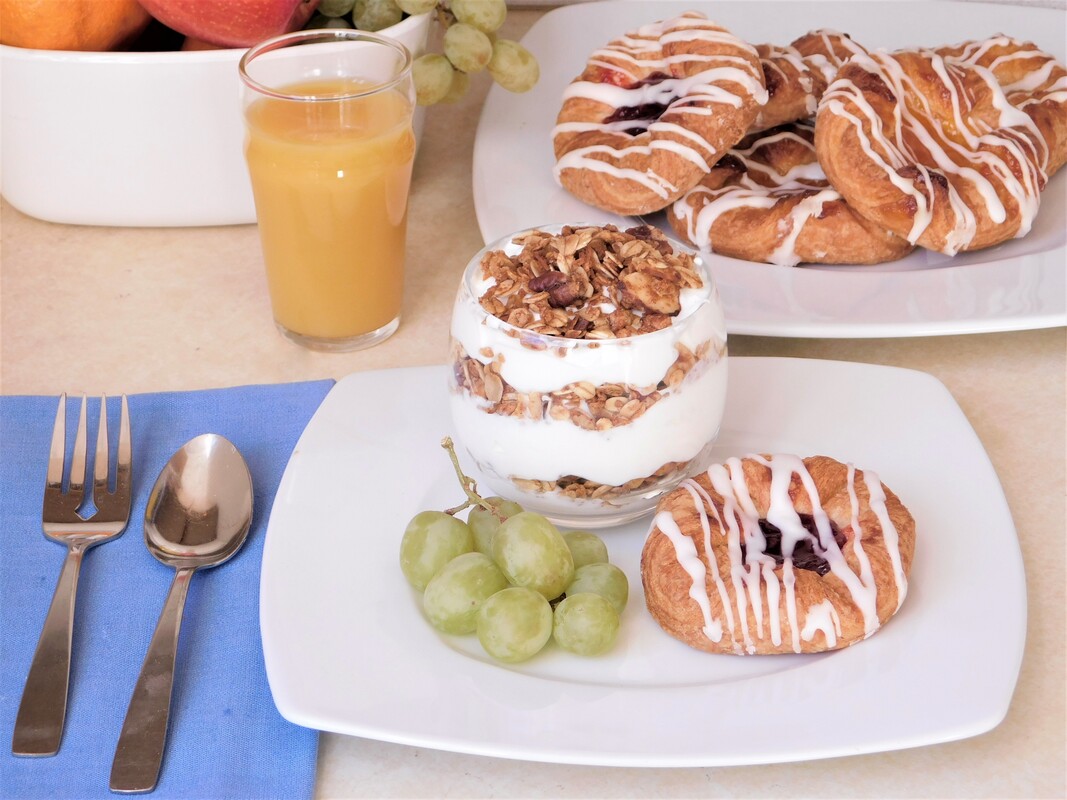
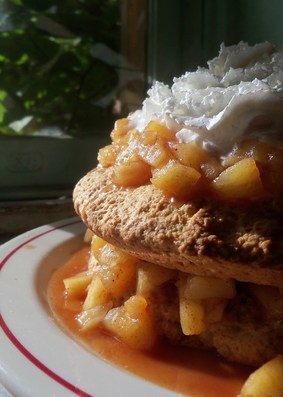
There are a lot of different ways to shape Danish pastries. Here's a couple of ideas from Craftsy (where I just happen to have a couple of online classes!) I'll be posting some additional ideas in the days ahead. But right now, I think I'll have a little breakfast.

Picture
0 Comments

Baking Mix Recipes

5/4/2020

1 Comment

 
With Breadheads and newbie bakers alike finding it hard to locate yeast during the quarantine, I thought I would offer instruction on how to create a "no yeast" multigrain baking mix which can be used for quick breads like muffins, biscuits, waffles and the like. Here is the short video I made with instructions. The recipe follows.
Multigrain Baking Mix and how to use it
 
If you already use baking mixes, you might be surprised to see that this version requires refrigeration, but you might be equally surprised to discover that the package on the commercial versions also recommends that you refrigerate their product after opening. But most baking mixes use shortening and have a number of preservatives and therefore are more “shelf-stable” as they say in the food biz. My version has no preservatives and uses butter (far fewer trans fats), which with the addition of whole grains makes it a healthier alternative. (If you’re going low-fat, use only one stick of butter.) You can use it one-to-one in any recipe that calls for baking mix.
   
Multigrain Baking Mix
Ingredients:
3 cups all-purpose flour
1½ cups whole wheat flour
¾ cup quick cooking oatmeal
½ cup yellow cornmeal
¼ cup milled flaxseed
2 tablespoons baking powder
1 tablespoon salt
1 cup (2 sticks) cold unsalted butter, cut into slices
 
Place dry ingredients into food processor and process until thoroughly mixed. Add butter and pulse until well blended. Store in an airtight container in the refrigerator up to 6 weeks (depending upon how fresh your butter is). If you use salted butter, reduce the salt in the recipe by ½ teaspoon.

Picture
 Pancakes
2 cups baking mix
1 cup milk
2 eggs
N.B.: This is the classic recipe, but I think these are better with 1¼ cup of milk and only one egg.  I can't imagine you need anything more than the ingredients!


Picture
Waffles
2 cups baking mix
1 1/3 cups milk
2 eggs
Separate the eggs, then beat the milk and yolks Add milk mixture to baking mix and stir until just combined. Whisk egg whites until stiff peaks appear and fold gently into batter.  Use in waffle iron according to manufacturer's instructions.
NOTE:
​If you like a waffle with a crisp exterior, leave the waffle iron closed until the steaming stops.

Picture
(OK, the picture here isn't blueberry muffins--those are chocolate and butterscotch chips---but you get the idea!)
Blueberry Muffins

2 cups baking mix
1⁄3 cup sugar
2⁄3 cup milk
2 tablespoons vegetable oil
1 egg
3⁄4 cup frozen blueberries
 
Heat oven to 400 degrees and coat muffin pan with cooking spray. Combine sugar, milk, oil and egg in a small bowl and beat well. Place baking mix in a medium bowl and add liquid, stir until just moistened. Gently fold in the blueberries. Divide batter evenly in 9 muffin cups.
Bake 13 to 18 minutes or until golden brown.

Picture
Baked Cinnamon Donuts with Chai Glaze
Donuts
1¾ cup of baking mix
1/3 cup granulated sugar
½ tsp. ground cinnamon
¾ cup 2% milk
1 egg
¼ cup vegetable oil
 
Preheat oven to 375° F. and lightly grease a donut pan. In a medium-size bowl, combine flour, sugar, salt, and cinnamon and whisk thoroughly to combine. In a separate bowl, whisk together milk, egg and oil. Pour milk mixture into dry ingredients and stir until smooth. Divide batter into pan. Bake in preheated oven for 15 to 20 minutes or until slightly firm to the touch and an inserted toothpick comes out clean. Cool in pans for five minutes before removing from pan to a wire rack; frost while warm.
 
Chai Frosting
Make one cup of sweetened chai tea. In a small sauce pan, bring to a boil, then reduce heat to a low simmer. Reduce to about ¼ cup of thick syrup. Immediately add 1 cup of powder sugar and a pinch of salt, and whisk until smooth. While mixture is still warm, use to lightly glaze donuts.


Picture
Pumpkin Spice Donuts
2 cups baking mix
2 teaspoons pumpkin pie spice
1 cup pumpkin puree (not pie filling)
2 eggs
3/4 cup liquid pumpkin spice creamer (or 1/2 cup milk)
¾ cup packed brown sugar
¼ cup canola oil


Preheat oven to 350 degrees F. Prepare two donut pans (12 donuts total, or 24 mini donuts) with cooking spray and set aside. In a medium size bowl, whisk together baking mix and pumpkin pie spice. In a separate bowl, combine pumpkin, eggs, creamer/milk, sugar and oil. Add the flour mixture to pumpkin mixture and stir until nearly smooth—do not overbeat. Allow to sit for 5 or ten minutes while the whole grains absorb the liquid, which takes longer than with all-purpose flour.
 
Transfer the batter to a large ziploc bag and expel excess air before sealing. Snip one corner of the bag and pipe batter into donut pans---each section will be slightly more than half full. Bake for 12-15 minutes or until donuts are lightly browned and spring back when touched. Allow donuts to rest about five minutes in pan before removing to cool on a wire rack.

Glaze or frost as desired, or toss in cinnamon sugar. 


Picture
Welsh Cakes
2 cups baking mix
1/3 cup granulated sugar
½ teaspoon cinnamon
¼ teaspoon freshly-ground nutmeg
½ cup currants or raisins
1 large egg
1/4 cup cold milk
Butter for the pan

Combine baking mix, sugar and spices in a medium-size bowl and whisk to blend.  Stir in the currants. In a separate small bowl, beat the egg with the milk; stir into mixture to make a soft dough. Turn the dough out onto a lightly floured board and knead briefly, 8 to 10 strokes. Lightly flour the board, then roll the dough to a 1/4-inch thickness. Cut into rounds with a fluted cookie cutter (2½” or 3”size).  Heat a cast iron skillet over medium-low heat (or use an electric skillet set to 350° F).  Brush the surface of the pan lightly with butter and cook the cakes for about 3 minutes per side, or until they are golden brown. (I usually test one first to make sure I have the temperature correct--they should come out soft in the middle but not at all doughy).  Remove to a wire rack and sprinkle with granulated sugar.  Serve warm.


Picture
The photo shows the version with a strawberry cake filling, but any way you make this coffeecake it's delish!
Quick Cinnamon Coffee Cake
Streusel
2/3 cup baking mix
2/3 cup packed brown sugar
1 teaspoon ground cinnamon
3 tablespoons cold butter
 
Coffee Cake
2 cups baking mix
1/8 teaspoon baking soda
2 tablespoons granulated sugar
¾ cup sour cream
1 ½ teaspoons vanilla
1 egg
 
Heat oven to 375°F. Spray bottom and sides of 9-inch round cake pan with cooking spray and dust with flour. Combine 2/3 cup baking mix, brown sugar and cinnamon in a small bowl. Cut in butter using pastry blender, until the mixture resembles coarse crumbs; set aside.
 
In medium bowl, combined  baking mix, baking soda, and sugar and whisk until blended. In a separate bowl, beat sour cream, vanilla and egg until smooth. Stir into dry ingredients until combined. Spread about 1 cup of the batter in pan. Sprinkle with about 3/4 cup of the streusel. Drop remaining batter evenly over top of streusel and sprinkle remaining streusel over top.
 
Bake 20 to 24 minutes or until golden brown. Let stand 10 minutes before removing from pan and allow to cool slightly before serving.
 
Variations
Add another tablespoon of butter to the streusel. Peel and core two medium baking apples and slice them thinly. After you put half of the batter in the pan, arrange apple slices on top and sprinkle with half the streusel. Add the second layer of batter and the remaining streusel. Bake as directed—may need up to 25 minutes in the oven. You can do the same with fresh or even canned peaches, but cut them into small pieces.
 
Make only half of the streusel. After you put half the batter in the pan, add a layer of cake and pastry filling or pie filling. If you use cherry filling, use almond extract instead of vanilla, and add some slivered almonds to the top streusel.
 
Omit the cinnamon from the streusel recipe, and use 1½ to 2 cups of fresh strawberries as the filling. You can use half brown and half white sugar for the streusel.

Picture
Whole Grain Nutty Shortcake with Tart Apple Topping
3 cups of multigrain baking mix
½ cup light brown sugar, firmly packed
¼ teaspoon ground nutmeg
½ cup coarsely chopped pecans
1 egg
¾ cup of milk
 
 APPLE TOPPING
½ cup brown sugar
2 tablespoons cornstarch
1 tsp. ground cinnamon
¼ tsp. salt
1 ½  cups apple cider or apple juice
5 cups tart apple pieces (peeled, cored, quartered and sliced)


Heat the oven to 425 degrees F. Combine baking mix, brown sugar, nutmeg and nuts in a medium size bowl. In a separate bowl, whisk together egg and milk. Add milk mixture to flour mixture and stir until blended; beat for one minute. Divide dough in half and into two greased 9-inch pie pans.  Bake in the preheated oven for 15 to 20 minutes, or until lightly browned and slightly firm to the touch.

While the shortcake is baking, make the topping.  Combine the brown sugar, cornstarch, cinnamon and salt in a large saucepan. Stir in the cider and cook over medium high heat until the sauce is clear and thickened. Turn the heat down to medium, then add the apples.  Cover and let simmer until the apples are tender. Spoon half of the apple mixture over each shortcake layer (you may serve them individually or stacked.)  Serve warm with whipped cream and toasted pecans for a garnish.

1 Comment

Lake Thunderbird 2018 Day #3

7/3/2018

2 Comments

 
PictureRecipe for these whole grain pancakes at https://www.kingarthurflour.com/recipes/homemade-whole-grain-pancake-mix-recipe
My sourdough pancakes were somewhat less than successful this morning, because I was careless about measuring the baking soda. Anyone who has watched me in the kitchen at home knows that I am a “grandma baker”: like a grandma who has been making the same recipes for many years, I don’t do a lot of measuring of ingredients. But in the case of baking soda, I have learned to my sorrow, one must proceed with more caution.

​Sourdough yeast and its accompanying lactobacilli produce acids, which is where the tangy flavor comes from. By added something alkaline (baking soda) you get carbon dioxide bubbles, which creates a lighter, fluffier product. But the rule of thumb is “1/4 teaspoon of baking soda per cup of flour”. Evidently, my eye was less than accurate this morning, because the pancakes were fluffy but had a decided chemical taste, indicating that there was more baking soda than could be neutralized by the acids in the batter. As usual, I mixed my starter with multigrain flour and a little filtered water the previous evening so it could develop overnight, but chemistry trumps even the best of intentions!

So I kept that maxim carefully in mind as I worked on my “Fruit and Nut Bread To Serve with Cheese” (gotta come up with a better name) this afternoon. The recipe I used for inspiration had less than two cups of flour but 2 teaspoons of baking powder and ½ teaspoon of baking soda, both which seem a little high to me, given the small amount of flour. Also the original recipe had no source of acidity to it—no lemon juice, brown sugar, buttermilk, or cream of tartar, to name the usual suspects. So I don’t know why baking soda was part of the recipe in the first place.
Picture
But my adapted recipe uses yogurt as one of its liquids, so a quarter teaspoon of baking soda makes sense, along with 1 ½ teaspoons of baking powder. I knew that using the bare minimum would result in a denser bread, but that’s what I was hoping to achieve: something moist and dense that could stand up to aged cheeses.  As you can see, the results were beautiful, but not entirely satisfactory. I think I used too much dried fruit---even paired with sharp cheese, the bread was cloyingly sweet. I also should have gone with my initial thought of omitting the vanilla called for in the original recipe, as that flavor didn’t pair well with the cheese either.

​By itself, served warm with butter, the bread still seemed too sweet to me but I suspected it might still be enjoyed by the officers at the local police station. That’s where I usually take my test recipes when I’m at the lake cabin, so I don’t blow my blood sugar sky high! They 9and all first responders) stay plenty busy during the 4th of July celebrations, so if you have an extra plate a cookies, drop them by the local station.

Picture
Find out other ways to show support for police, firefighters and EMT's at https://thankyoufirstresponder.org/
2 Comments

National Donut Day 2018!

5/31/2018

0 Comments

 
Picture
Every year the first Friday of June is National Donut Day, something I write about on this blog or on Facebook nearly every year (HERE is a collection of my Bread Blogs on the subject). My personal favorite is plain glazed like the beauties to the left, but decided to make the slightly healthier baked donuts this afternoon. 

Picture
Few baked goods tempt me the way donuts do, and most of them, it must be admitted, are not a heart-healthy, diabetic-friendly choice on a breakfast buffet. I have always pooh-poohed baked donuts, but today's Chocolate Spiced Donuts turned out to be far better than I expected. Among the other advantages of this recipe is that you can substitute a gluten-free baking mix and still get excellent results, which is true of most cake donut recipes. The pans can be found in specialty shops and some larger department stores---surprisingly, I got one of mine at Ace Hardware and, not surprisingly, the other one at the Salvation Army store!

​Baked Chocolate Spiced Donuts with Mocha Frosting
Donuts

¾ cup of all-purpose flour
⅓ cup granulated sugar
¼ cup cocoa powder
½ teaspoon baking powder
⅛ teaspoon baking soda
½ teaspoon salt
¾ teaspoon ground allspice
½ teaspoon cinnamon
¾ cup buttermilk
1 egg
¼ cup vegetable oil

Frosting (see directions)
1 cup powdered sugar
2 tablespoons cocoa powder
1 teaspoon instant coffee
2 or 3 tablespoons of milk or half and half

Preheat oven to 375° F. and lightly grease a donut pan. In a medium-size bowl, combine flour, sugar, cocoa, baking powder, baking soda, salt, allspice and cinnamon and whisk thoroughly to combine. In a separate bowl, whisk together buttermilk, egg and oil. Pour milk mixture into dry ingredients and stir until smooth. Divide batter into pan. Bake in preheated oven for 15 to 20 minutes or until slightly firm to the touch and an inserted toothpick comes out clean. Cool in pans for five minutes before removing from pan to a wire rack; frost while warm. For frosting, whisk ingredients in a small bowl until smooth. Warm slightly in a microwave before dipping donuts, smooth side up, into frosting. Let excess drip off and return to the wire rack to firm up.  
Makes six regular size donuts.
0 Comments

Coffee Cake to warm a snowy winter's day

2/11/2018

0 Comments

 
PictureSource: www.slate.com
As most of you Breadheads know by now, my baking is most often inspired by leftovers: most often by mashed potatoes, but occasionally by expired Halloween candy, a picked-over cheese tray, a cup of creamed corn, or some other food item that has seen better days. This time, two cartons of sour cream made me tie on an apron. Evidently the admissions office of our high school had some kind of Mexican food delivered for a meeting, because the fridge had several containers of salsa, guac dip and the like, along with the aforementioned sour cream. I had spent the past week teaching a theatre camp for 16 Chinese students on their winter break (and you thought monastic life was dull, didn't you?) and hadn't had time to bake. My campers were off on a Chicago field trip with some other faculty members, and I was itching to try out a pair of small Bundt pans I had recently acquired ($2.49 each) at the local Salvation Army, so I thought a sour cream coffee cake was in order.

PictureThe 12 cup and 6 cup versions of a Bundt pan..
Bundt pans weren't very common in the United States until 1966, when someone entered their "Tunnel of Fudge Cake" in the 17th Pillsbury Bake-Off. It took second place, and spurred sales of the fluted aluminum pan with the center post until nearly 70 million household kitchens have one today. They come in 12, 9 and 6 cup increments, the latter being my most recent purchase.

Picture
So I mixed up a sour cream coffeecake recipe called "Coffee Cake Exceptionale" which I have written about in a previous post and shared the recipe.  It had been snowing all weekend, so warming up the kitchen with the aroma of a cinnamon-flavored cake made the whole first floor seem cozier. The recipe was the perfect size to make two coffee cakes in the six cup pans---one for the brethren and one to share with a friend who spent the weekend plowing snow for 12 hours a day. If you need a treat to reward someone who shoveled your walk or to cheer up a friend with the winter blahs, this coffee cake is a great choice. If you are one of the few people without a Bundt pan, a 9" x 13" cake pan will do just as well.

NOTE: If you use the small Bundt pans you will have to reduce the baking time by half, more or less---keep a close eye on the oven and use the "toothpick test".  

0 Comments

National Corn Fritter Day July 16

7/15/2017

1 Comment

 
Picture
Yesterday I attended the Marshall Putnam County Fair (Henry, Illinois) with my sister Angela, who, like me, enjoys eating from the "fatal food group." Enjoying lemonade shake-ups and cheesy fries with her reminded me of my family's love of summer fairs and festivals while we were growing up. Between that and National Corn Fritter Day July 16, I decided to share the following excerpt from my new book Baking Secrets from the Bread Monk" Tips, Techniques, and Bread Lore (Reedy Press) which is available on the abbey's Monks' Market website.
 
From the chapter titled "Food Holiday Mash-ups"

July is designated National Culinary Arts Month, with a grateful nod to culinary professionals, from TV celebrity chefs to the under-appreciated line cook who makes the best hash browns at the local diner. Culinary training runs the gamut from small classes at cooking stores to junior college degree programs to the Cordon Bleu. But the term “Culinary Arts” always reminds me of the sign above the doorway to a barn-like structure at the Peoria Heart of Illinois Fair where my mother entered her bread every year (her raisin bread took first place nearly every time she entered it).

 
I love fair food in general and fried foods in particular: corndogs, haystack onion rings and funnel cakes are my personal faves. But there was one year at the Heart of Illinois Fair when a local church set up a tiny trailer out of which they sold fresh corn fritters. These fried delights were dredged in powdered sugar, and served piping hot in a brown lunch paper bag. I devoured several bags’ worth over the course of the week of the fair, and eagerly anticipated their return the following year. But alas, I was disappointed in my expectation---the little trailer with the hand printed cardboard sign never returned. You’ll have to settle for the homemade version yourself, and hope they are as good as my memories.

Picture


Corn

Fritters


Oil for frying

1 cup all-purpose flour
2 teaspoons of sugar
1 teaspoon baking powder
¼ teaspoon of salt
2 large eggs
½ cup milk
2 tsp. vegetable oil
1 12 oz. can of corn, drained  (3/4 cup, fresh)
Powdered sugar for coating
 
Heat at least 2” of oil to 375 degrees F., either in an electric fryer or in a heavy pan over medium heat. You may use an electric deep fryer as well.  Measure flour, sugar, baking powder and salt into a bowl and whisk to combine ingredients thoroughly.  In a separate bowl, beat eggs, milk and oil together, then stir in the corn kernels. Pour wet mixture into the bowl with the dry ingredients and stir until thoroughly combined. Drop tablespoons of the batter into the hot oil and fry until golden brown on both sides---they may need some help turning over. It takes only two or three minutes for them to cook, so don’t crowd the pan or the oil will cool and the fritters will be soggy with grease. Remove the fritters to drain on paper towel, then roll them while warm in the powdered sugar to coat (some people prefer granulated sugar). Serve immediately.
 ​

1 Comment

Food Holidays

9/12/2016

2 Comments

 
PictureSeptember celebrates Whole Grains, Honey, and Raisins---as does this bread!
I’ve been researching food holidays for an upcoming book, and based on what I could find online, there are an astonishing number of food-related “holidays” in the course of a calendar year, celebrating everything from dietary fiber to decadent desserts. It seems as though every fruit, vegetable, bread group and protein has a special day. Which prompts one to ask: How are such days established?
 
The President of the United States of course has the authority to declare a commemorative event or day by proclamation---so can state legislatures and local mayors, for more regional celebrations. But in the end, like most things political, it’s all about lobbying. Petitions are usually introduced by trade associations or public relations firms hired by the portion of the food industry responsible for a particular food’s sale and distribution. ‘Twas ever thus.
 
But let’s not be too cynical about how the holidays got put on the calendar. I would be happy to enjoy cream puffs (January 2), Oatmeal Nut Waffles (March 11) or falafels (June 12) on any day of the year without any inspiration beyond my own love for baked goods. So in honor of September’s position as both National Honey Month and Whole Grains Month, plus National Raisin Day on the 30th, I’m sharing a recipe for Raisin Walnut Bread which uses stone ground rye flour in the dough and honey as the sweetener.

Raisin Walnut Bread
1 cup lukewarm milk

1 cup lukewarm water
2 pkg. active dry yeast
2 Tbs. dark honey
2 Tbs. vegetable oil
1 ½  tsp. salt
2 cups stone ground rye flour, divided
3 to 3¼ cups bread flour
2 cups raisins (I like the mixed colors)
1 cup walnuts, medium chopped (optional)
 
In a large bowl, mix milk, water, honey, yeast, and one cup of rye flour.  Allow yeast to develop for five minutes.  Then add oil and salt; mix well.  Stir in the remainder of the rye flour and allow dough to rest for 10 minutes as the rye flour absorbs moisture.  Add 3 cups of the bread flour, one cup at a time, mixing thoroughly each time.  Turn dough out onto a lightly floured board and knead vigorously for 8 to 10 minutes, adding enough of the remaining bread flour to make a firm (but not stiff) dough that is slightly sticky.  Rinse out the bowl.  Lightly oil the surface of the dough and place it back in the bowl; cover with a towel.  Allow to rise in a warm area free for drafts for 60 to 75 minutes, or until doubled in bulk. 

Punch down dough and knead briefly to work out the larger air bubbles.  Roll the dough out to a thickness of about ½”.  Sprinkle nuts and raisins on top of the dough.  Fold the edges of the dough toward the center and knead for a few to distribute the raisins and nuts evenly.  (At first it will be messy and seem to be falling apart, but be patient; it will all come together.)  Divide the dough in two and shape into loaves.  Place loaves in lightly greased loaf pans (8” x 4” x 2”) and cover with towel.  Let rise for 40 minutes or until nearly doubled in bulk.  Pre-heat the oven to 350°.  Bake for 35 to 45 minutes, or until golden brown and loaves sound hollow when tapped.  Cool on racks.
 

Notes---The rye requires some extra gluten—hence the use of bread flour. You could use all-purpose flour but then I’d recommend adding a tablespoon of gluten powder.
---This bread is at its best toasted and used for a chicken salad sandwich.
 

2 Comments

Challah Babka

8/19/2016

2 Comments

 
Picture
Chocolate Babka. Photo by Craftsy.com
Most people only know about babka because of the episode on Seinfeld in which Jerry and Elaine miss out on the last chocolate babka and have to settle for cinnamon version, which Elaine thinks of as “the lesser babka.” Both are excellent, and I'm partial to the cinnamon variety, but the chocolate kind is what I made for my Craftsy class, so here's a description and recipe.

The word babka means “grandmother” in Polish, and may have been applied to the pastry because it was often made in a tall, fluted cylindrical pan that produced a cake shaped like a pleated skirt.  Some people make it in a loaf pan or as a wreath on a sheet tray. 
When I make babka, I like to use a Bundt pan so the resulting loaf has a decorative shape and some height.

Challah featured prominently in my Craftsy Class---the last three lessons, actually---with "Half-Pipe Chocolate Babka" being the crown of my instruction. 
For my class I used a Holiday Challah dough recipe that makes a HUGE batch and has to be kneaded by hand unless you have a larger stand mixture that can manage the equivalent of three loaves of bread. Here's the recipe for a simpler dough you can make in an ordinary KitchenAid.

3¼ to 3½ cups of all-purpose flour, divided
¼ cup of granulated sugar
1½ teaspoons of salt
1 pkg. instant yeast
¾ cup warm water
2 eggs, room temp
1 egg yolk (save egg white for the glaze)
¼ cup neutrally flavored oil (canola or a very light olive oil), 

Place 3 cups of flour, sugar, salt and yeast into a medium size bowl and whisk them together. Place water, eggs and egg yolk into the bowl of a stand mixer. Blend with a paddle attachment, then add flour mixture a small scoop at a time, with the mixer on medium speed. Once all the dry ingredients are incorporated thoroughly, beat in oil at a slightly higher speed into smooth.

Switch to a dough hook attachment. The remaining flour is added gradually until you have a mass of dough that pulls away from the side of the bowl. Knead with hook for 5 minutes. The dough should be smooth, elastic and a little bit sticky. Remove dough hook and cover bowl with a clean dry towel. Allow to rise for 60 to 90 minutes---a richer dough usually means a slower rise.

Lightly grease a Bundt cake pan. Roll dough out to 20” x 24”. Spread filling (recipe below) evenly over the surface, leaving the top wide edge 1” uncovered. Brush top edge lightly with water. Roll up from bottom wide edge and pinch to seal. Place the roll on a cutting board seam side up and cut down the middle with a large sharp knife or large pizza cutter. (Photo below.) Turn halves with the filling side facing upwards. Starting from the middle, twist the two side together towards one end. Repeat with other side. Carefully lift the twist into the prepared pan and arrange so it’s even. Cover and let rise for 30 to 45 minutes or until nearly doubled. Bake in a preheated 350 F. oven for 40 to 45 minutes. Interior temp of the bread should 190 F. on an instant read thermometer.   

Filling
¾ cup semisweet chocolate chips
⅓ cup unsalted butter
¼ cup powdered sugar
⅓ cup cocoa powder

In a small saucepan, melt butter over low heat and whisk in chocolate chips. Sift powdered sugar and cocoa powder together into the pan and whisk until smooth. Remove from heat.
Picture
Chocolate babka slice. Photo: Fr. Dominic
This has to be served on the nicest china cake plate you have, preferably one from your grandma. Seasonally decorated plates are nice, too. Some people add a little chocolate drizzle to dress it up or a light dusting of powdered sugar. But once you cut the first wedge, the interior is so beautiful you won’t care about the loaf’s surface, and the tender crumb and sweet filling don't need any additional sugar.
Picture
The filing in this oicture is almond, and you're supposed to cut all the way through at the top, but you get this idea.
I make two other versions of babka, one with a sugar and spice filling, and the other as the pinnacle of sweet bread decadence: Nutella salted caramel babka. For the spice variety, I spread melted butter over the surface of the dough, and then sprinkle on a half-cup mixture of equal parts white and brown sugar with a teaspoon of Chinese five spice (you could use just cinnamon, or pumpkin pie spice, too). In my opinion, no need for streusel, just butter and hot coffee.
Picture
For the richer version, I heat a 13 oz. jar of Nutella in the microwave for about 10 seconds, and then spread it over the rolled out dough using an offset spatula or plastic bench knife. Then I sprinkle on 5 or 6 oz. of Kraft Premium Caramel Bits (about half an 11-oz. package) and then 1/4 tsp. of kosher salt. Roll it up and continue as directed--the result is below.
Picture
Forgive me, dieters, if I have led you into temptation.
Picture
2 Comments

Craftsy Shoot Day 3

8/13/2016

0 Comments

 
Picture
The ongoing account of my days of shooting a six part online class for Craftsy.com August 2- 5 . . .

The class is titled "Bake You Best: Sweet Yeast Breads, Challah and More" and will launch by early September. Stay tuned to this blog for a chance to be enrolled in the class for FREE and for other special discounts.
​

Thursday's shoot began with a blossom and ended with a braid. Apricot Blossom Coffeecake is a monastery favorite which has not yet made it into a cookbook but has been featured in this blog before (clock HERE for the photo tutorial). There was one error that could have been disastrous if we had been baking for something other than a taped class and the accompanying photos. Brian, one of my kitchen angels, had never used nor seen coriander before, and it was one of the ingredients in the apricot filling. Evidently the jar lids had been switched, and he used garam masala instead, which has coriander in it but a LOT of other spices as well, including a healthy amount of black pepper! The bread was unexpectedly spicy, but if he had used about half the amount, it would have been one of those sweet/hot flavor profiles that would pair well with a creamy cheese. A happy accident might yield a new recipe . . .
Picture
Apricot Blossom, black pepper and all! Photo: craftsy.com
Next we started on the challah portion of the class. My orginal class proposal had been just for breakfast breads, but the green light committee had decided they wanted challah added, first as a single lesson and then they expanded it to three lessons. I must admit, the class is much more interesting and educational thanks to their input.

Challah is a part of Jewish baking tradition and is often served for the Sabbath and for holidays. It's a bread rich with eggs, slightly sweet and utterly delicious. I made my first loaf for a cast party for Fiddler on the Roof  when I was a senior in high school and have been baking it regularly ever since. A braided loaf is the traditional shape, but until I started researching for this class, I had no idea just how many kinds of braids are out there. Challah is often served as pull-apart rolls as well, which is the first shape we featured in the class.
Picture
Pull-apart challah rolls with poppyseed. photo: Craftsy.com
The recipe I used was one a developed specifically for the class (I promise I'll share it eventually) to be made in a KitchenAid or other stand mixer. Challah dough often comes in huge proportions, since people are baking for larger groups for the holidays---recipes using 5 lbs. of flour are not uncommon. This one can be made in the very smallest model of KitchenAid, the one you buy first and use until you realize you want to make biggest batches of challah! I showed how to make braided sandwich rolls, another common shape for challah.   
Picture
Braided sandwich rolls made with challah dough. photo: craftsy.com
Lastly for this lesson I showed a slab braid, which I've featured on this blog several times. HERE is the YouTube video that I made a few years ago. A slab braid is a lot easier to shape than one that requires you to roll out ropes or strands to exactly the right size and shape. But that is exactly what we did in the next lesson, showing a three and a six strand braid using the traditional method.
Picture
Clockwise from left: slab braid, six strand braid (both with an egg white wash) and three strand braid with a whole egg wash and sesame seed topping. Photo: Craftsy.com
Shooting on Thursday went a little overtime, and when I got back to the hotel my cousin was already waiting for me with two large pizzas from Amici's in Wheat Ridge (a family favorite) and we went to my uncle and aunt's house for a little family reunion. Lots of love and laughs and red wine, and way more food than we needed---which is to say, just as it always is in our Italian family!

Next up: Crown braid and chocolate babka!

0 Comments

Breakfast Butterflies

8/6/2016

0 Comments

 
Picture
Recently I've been experimenting with breakfast breads and I remembered that it's been awhile since I made Breakfast Butterflies. Butterfly rolls are an old-fashioned recipe one never sees anymore in cookbooks but which needs to be revived. You can use just about any filling, from cinnamon sugar to pesto, but I like mine with blueberry or almond filling. (A quick aside--I highly recommend the Solo brand Cake and Pastry Filling, which comes in a great many flavors and is every bit as good as homemade, in my experience. They are a member of the Home Baking Association, which has sponsored some of my videos, but I've not been paid or otherwise compensated for this little plug!)

Butterfly rolls are not much much harder to make than cinnamon rolls, with just a couple of other steps. You can use your favorite roll dough and your favorite filling, so what's not to love? I find that they are plenty sweet without a powdered sugar icing, but if you want a nice finish on them, heat up some light corn syrup in the microwave for about 15 seconds and brush that over the tops. As you can see from the photo above, it gives them a lovely shiny appearance but without adding a lot of extra sugar that will obscure the taste of the filling.

So have I convinced you to make them? I hope so. Click HERE for the recipe page. 


0 Comments
<<Previous

    Author

    Fr. Dominic Garramone AKA 
    the Bread Monk

    Categories

    All
    Breadhead Bookshelf
    Breakfast Breads
    Buns Rolls And Biscuits
    Craftsy
    Donuts
    Equipment
    Ethnic Breads
    Events
    Gluten Free
    Herbal Breads
    Holidays
    Lake Thunderbird
    Memories Of Mama
    Multigrain Breads
    Pastries
    Pizza
    Places To Visit
    Quick Breads
    Reflections While The Bread Is Rising
    Savory Breads
    Sourdough
    Spirituality
    Stuff Besides Bread
    Sweet Breads
    The Classics
    Tools Of The Trade

    RSS Feed

    Archives

    June 2024
    December 2023
    September 2022
    April 2022
    March 2022
    February 2022
    January 2022
    October 2021
    May 2021
    April 2021
    March 2021
    February 2021
    August 2020
    July 2020
    May 2020
    February 2020
    October 2019
    June 2019
    September 2018
    July 2018
    May 2018
    April 2018
    March 2018
    February 2018
    January 2018
    December 2017
    November 2017
    August 2017
    July 2017
    June 2017
    May 2017
    April 2017
    March 2017
    February 2017
    January 2017
    December 2016
    November 2016
    October 2016
    September 2016
    August 2016
    June 2016
    May 2016
    April 2016
    February 2016
    December 2015
    November 2015
    October 2015
    September 2015
    August 2015
    July 2015
    June 2015
    May 2015
    April 2015
    March 2015
    December 2014
    November 2014
    October 2014
    September 2014
    August 2014
    July 2014
    June 2014
    May 2014
    April 2014
    March 2014
    February 2014
    January 2014
    December 2013
    November 2013
    October 2013
    September 2013
    August 2013
    July 2013
    June 2013
    May 2013
    April 2013
    February 2013
    January 2013
    December 2012
    November 2012
    October 2012
    September 2012
    August 2012
    July 2012
    June 2012
    May 2012
    April 2012
    March 2012
    February 2012
    January 2012
    December 2011
    November 2011
    October 2011
    September 2011

Web Hosting by FatCow